Installation manual English
Copy the Release kit files from the below path to "D:\NexusCubes" folder
Release Kit Files Path: \\datasrv01\Software$\16 DomisCube\Freigegeben]
Note: Always take the latest files (cube_YYYY_M_yyyymmdd_hhmm.zip)
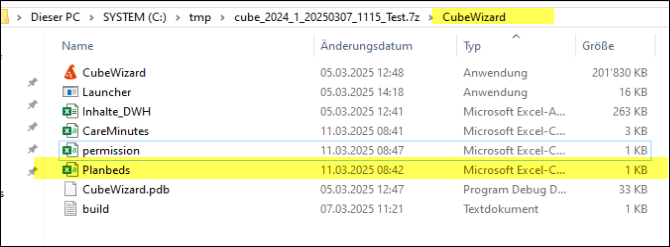
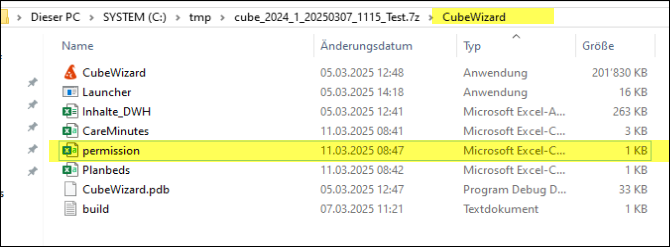
Once the .zip file is extracted into a folder, it looks like as below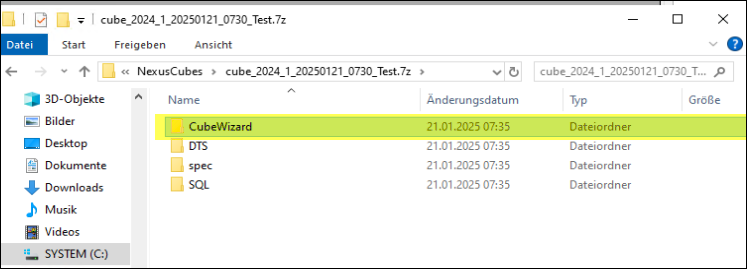
Go to the CubeWizard folder and click on "CubeWizard" install file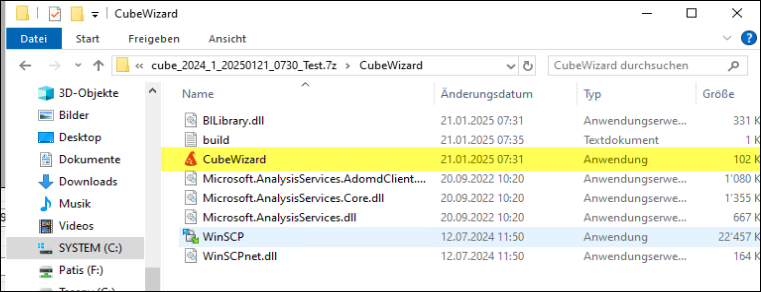
Once click the install file, it will open a CubeWizard window and it looks as shown below 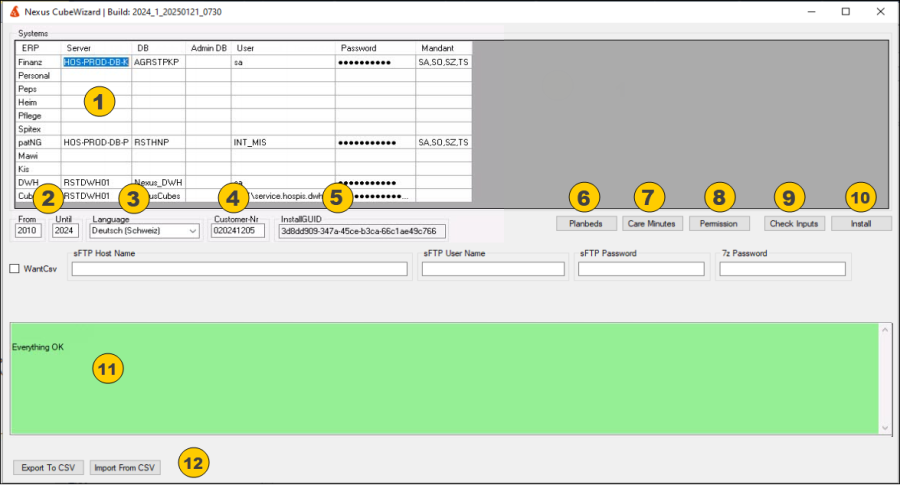
The individual points are described below:
1. In the Databases section, the servers and databases for the systems are entered.If the user and password are not specified, an attempt is made to access the respective database with Windows Authentication.If you do not want to evaluate any system in the data warehouse, leave the respective row empty.The individual columns are described below: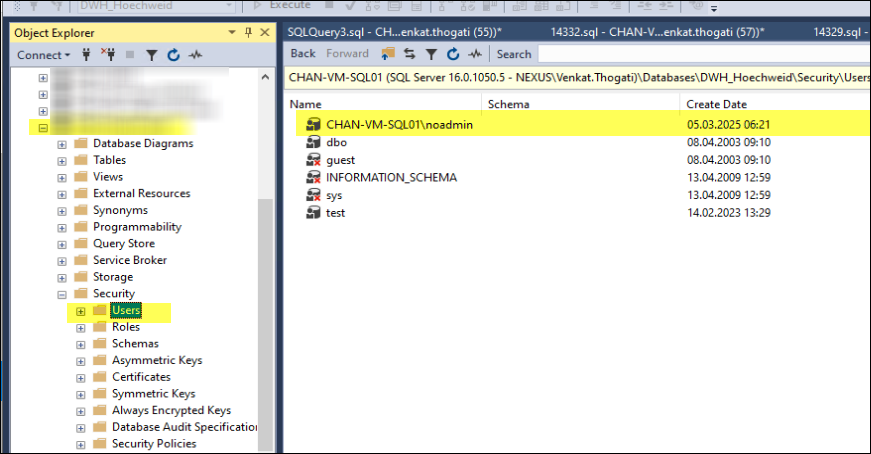
Column | Description |
ERP | Name of the ERP or name of the system |
Server | Server Name |
DB | Database Name |
Admin DB | Admin DB of Peps Stand Alone DBs |
User | Enter the username of the respective Data Base |
Password | Enter the Password of the respective Data Base |
Mandant | The clients (comma-separated), if you want all mandates in the data warehouse, you can enter a *. When you click on Installation, the * is then replaced by the clients. |
2. Period: Enter the From & To Date here (so the data will be load from based on these dates)
3. Language: Just keep it as default one [default one is Deutsch(Schweiz)]
4. Customer-Nr: Enter the 9 digits Customer number.
5. InstallGUID: This is non editable field, here no need to do anything from our side.
6. Planbeds: This feature provides flexibility in managing bed allocations across different cost centres. Users can allocate a specific number of beds to each cost centre as needed.
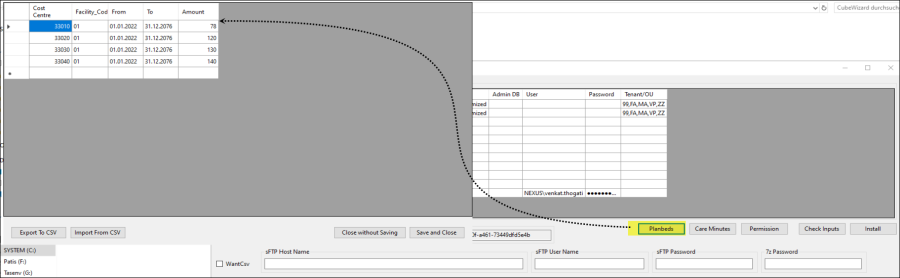
Export To CSV:
Clicking the "Export To CSV" button generates a CSV file containing all bed allocation data.
The file is saved in the CubeWizard folder.
Import From CSV:
Users can make changes to the exported CSV file as required.
The updated file can be imported back into the system using the Import button.
Once imported, the changes will be displayed in the table grid for review.
Saving Changes:
After reviewing the imported data, users have two options:
- Save and Close: Saves the changes to the actual database.
- Close Without Saving: Discards the changes without updating the database.
7. Care Minutes: This feature allows users to configure From Date, To Date, and Care Minutes for each care code.
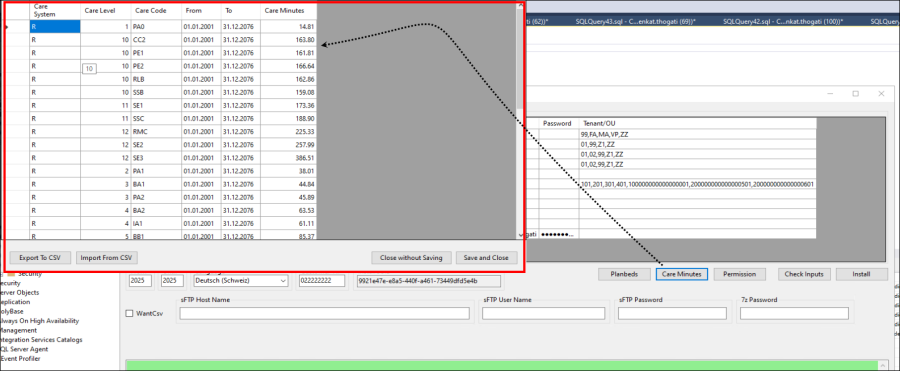
Export To CSV:
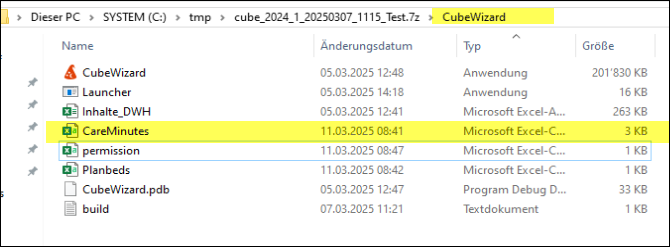
Clicking the Export button generates a CSV file containing all configured care minutes data.
The file is saved in the CubeWizard folder.
Import From CSV:
Users can edit the exported CSV file as needed.
The updated file can be imported back into the system using the Import button.
Once imported, the changes will be displayed in the table grid for review.
Saving Changes:
After reviewing the imported data, users have two options:
- Save and Close: Saves the changes to the actual database.
- Close Without Saving: Discards the changes without updating the database.
This feature ensures accurate tracking and management of care minutes across different care codes while maintaining flexibility in data updates.
8. Permission: This feature allows to grant users access to a specific cube with a designated mandant. Users will only be able to view and work with the data associated with the assigned mandant in that cube, ensuring controlled and secure access.
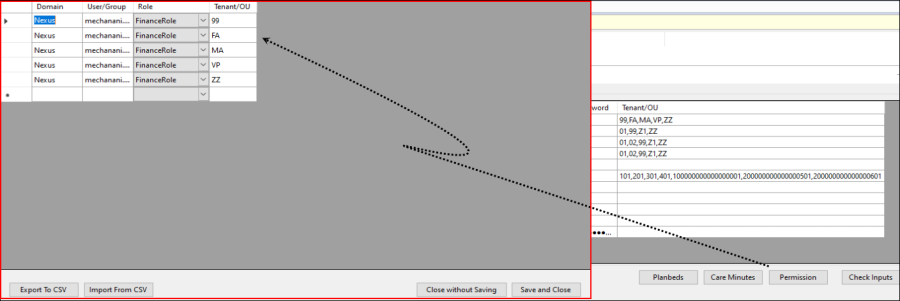
Export To CSV:
Clicking the Export button generates a CSV file containing all configured care minutes data.
The file is saved in the CubeWizard folder.
Import From CSV:
Users can edit the exported CSV file as needed.
The updated file can be imported back into the system using the Import button.
Once imported, the changes will be displayed in the table grid for review.
Saving Changes:
After reviewing the imported data, users have two options:
- Save and Close: Saves the changes to the actual database.
- Close Without Saving: Discards the changes without updating the database.
Check Inputs: Once click on this button, it validates all the given in-put values and gives the results.
Have a look at the below screen shot, it indicates about the "Check Inputs" activity

Install: Once click on this button, it starts the installation in the background.
Have a look at the below screen shot, it indicates about the "Install" activity 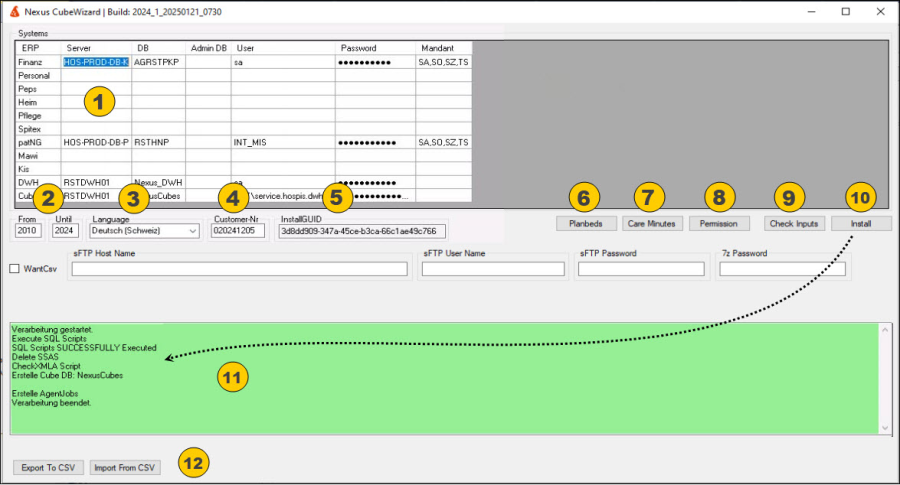
Output: If certain inputs are not correct, this will be output here.During installation, the status is displayed here.After successful installation, this area will be colored light green.
Export to CSV & Import From CSV:
Export To CSV:
Clicking the Export button generates a CSV file containing all configured of Cube Wizard.
The file is saved in the CubeWizard folder with name of System.
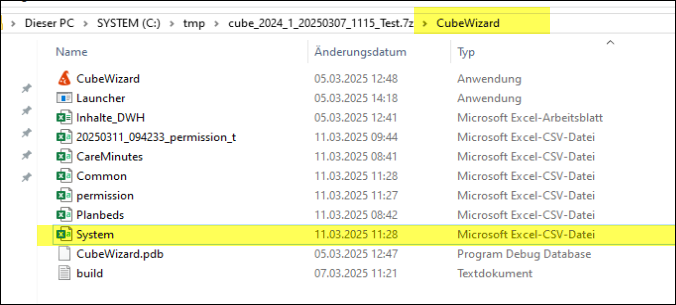
Import From CSV:
Users can edit the exported CSV file as needed.
The updated file can be imported back into the system using the Import button.
From here you can do your next steps
Once the installation is completed, it opens a pop-up window called "Licensed Cubes Form"
Here we have an option to Un-Check the cubes from the display (Un-Checked cubes will not be installed) list and click on button. 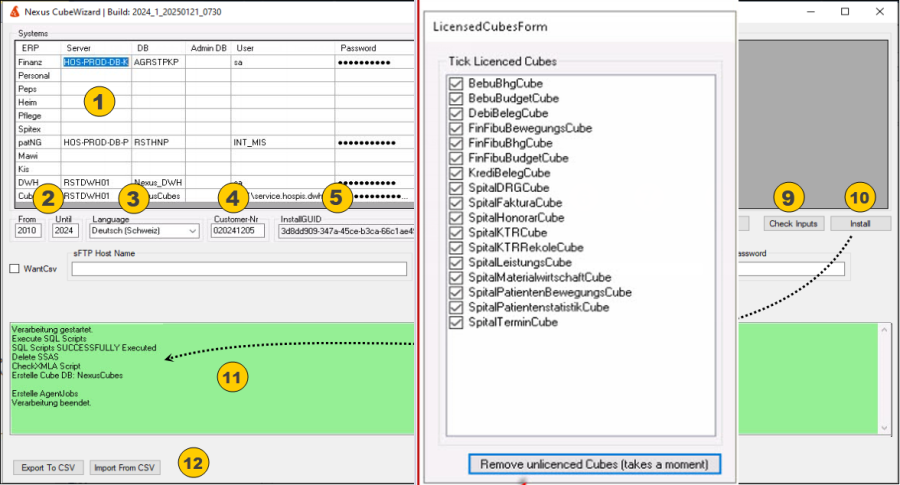
As soon as we clicked on the button (Remove unlicensed button) it opens pop-window as shown below.
In this pop-up window we have an option to select, which activity we have to do.
after the selection click on "Yes" and will starts the data transfer, loading & process the cubes. 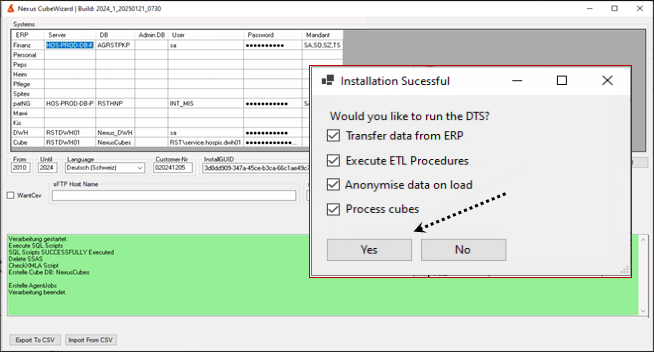
Transfer Data From ERP: It imports the data from Source to Staging environment.
Execute ETL Procedures: Here we load the data by applying some data cleansing techniques from Staging to Data ware house.
Anonymise data on load: Here we mask sensitive data and it's depending on the customer requirement
Process Cubes: Here we process the cubes.
after clicking on "Yes" button it opens below window
In this screen shot we can see status of each step (data transfer, loading & process the cubes)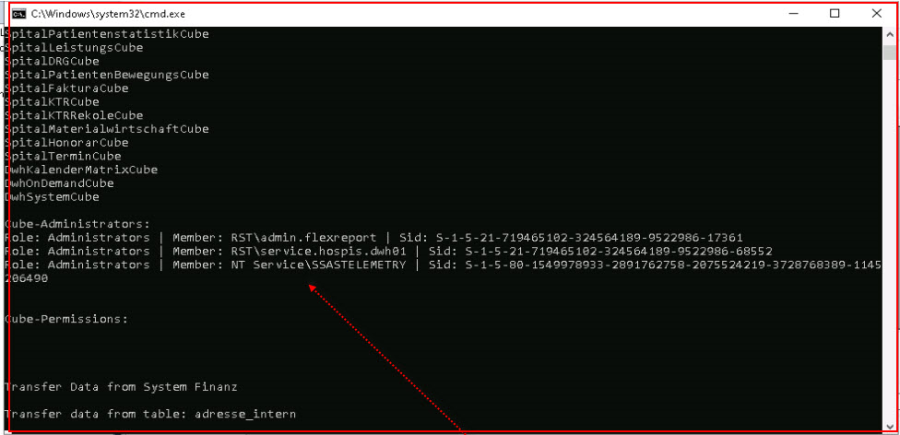
Once the data transfer, loading & process the cubes completed
Go to the SQL Jobs section as show below
Here we can two jobs will be there under the Jobs
These Jobs can be scheduled as per the requirements.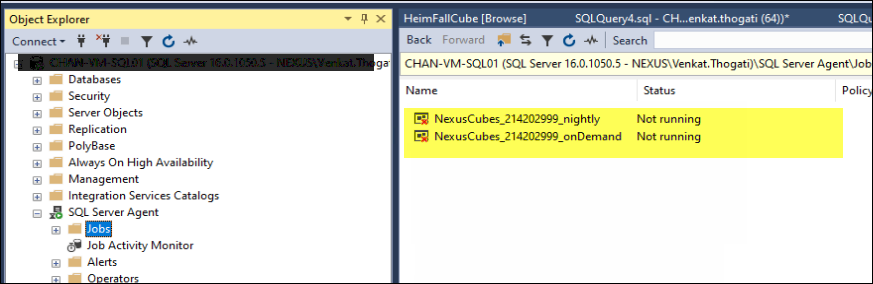
2. User Guide for Update an Existing Installation
Select the exiting install folder and Extract the Zip file to same folder.
At the time of updating the existing installation, we no need to enter the details again.
The wizard will be open with the data in all the fields (whatever we given in the previous installation).
From step 1 – step 8, mostly there will be no changes. But for the safer side please cross one by one from step 1-8.
After that follow from Step 9 to till end of the page no 5.
After the success full installation, we can see another two jobs with – need to check